
To get this to work under Linux, I used the NUT (Network UPS Tools) package with the "usbhid-ups" driver. Note that this driver was called "newhidups" until nut-2.0.5. The instructions below have been updated to reflect the new name.
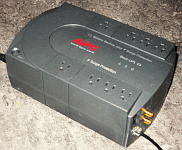
Update, December 2010: I just bought another APC Back-UPS, since the battery was failing on my old one. Except for minor cosmetic changes, this UPS is identical, including its interface, functionality, and cables, to the one I bought in 2005. I am still using a version of NUT from 2007, which works fine. I'll update this page if I upgrade to a newer NUT version.
| Variable | Typical value | Meaning |
|---|---|---|
| battery.charge | 100 | Current battery level (percent) |
| battery.charge.low | 10 | Battery level when UPS switches to "LB" low battery (percent) |
| battery.charge.warning | 50 | Battery level when UPS switches to "Warning" |
| battery.date | not set | Date when the battery should be changed |
| battery.mfr.date | 2005/04/02 | Date when the battery was manufactured |
| battery.runtime | 1980 | Current battery runtime (seconds) |
| battery.runtime.low | 120 | Battery runtime when UPS switches to "LB" low battery (seconds) |
| battery.type | PbAc | Battery chemistry |
| battery.voltage | 13.0 | Current battery voltage (Volt) |
| battery.voltage.nominal | 12.0 | Nominal battery voltage |
| driver.name | usbhid-ups | Driver name |
| driver.parameter.port | auto | Meaningless for USB |
| driver.version | 2.2.0 | NUT version |
| driver.version.data | APC HID 0.7 | usbhid-ups/APC version |
| driver.version.internal | 0.28 | usbhid-ups version |
| input.transfer.high | 139 | High voltage transfer point (Volt) |
| input.transfer.low | 88 | Low voltage transfer point (Volt) |
| input.voltage | 120.0 | Current input voltage |
| input.voltage.nominal | 120 | Nominal input voltage |
| ups.beeper.status | enabled | State of the beeper: enabled, disabled, or muted |
| ups.delay.shutdown | -1 | Time left until shutdown (seconds) |
| ups.firmware | 818.w1.D | Firmware version |
| ups.firmware.aux | w1 | Firmware version |
| ups.load | 9 | Current load on UPS (percent) |
| ups.mfr | APC | UPS manufacturer |
| ups.mfr.date | 2005/04/02 | Date when UPS was manufactured |
| ups.model | Back-UPS ES 650 | UPS model |
| ups.serial | QB0514132764 | UPS serial number |
| ups.status | OL | UPS status (OL=on line, OB=on battery, CHRG=charging, DISCHRG=discharging, etc |
| Instant command | Meaning |
|---|---|
| test.panel.start | Start testing the UPS panel (this will beep) |
| test.panel.stop | Stop a UPS panel test (this will do nothing) |
| load.off | Turn off the load immediately, and return when power is back |
| shutdown.return | Turn off the load after a 60 second delay, and return when power is back |
| shutdown.stop | Stop a shutdown in progress |
| beeper.on | Enable the UPS beeper |
| beeper.off | Mute the UPS beeper (it will revert to "enabled" once the UPS goes back online) |
In the instructions below, the commands shown in blue must be issued as root; the
commands shown in green
can be issued as an ordinary user.
Disclaimer: The the following instructions are distributed in the hope that they will be useful, but WITHOUT ANY WARRANTY; without even the implied warranty of MERCHANTABILITY or FITNESS FOR A PARTICULAR PURPOSE. They are supplied "as is", may or may not have been tested, and they may or may not work for you. They may damage your UPS, your computer, your marriage, or all of the above. THERE IS NO WARRANTY. See the GNU General Public License for more details.
ls /usr/lib/libusb* /usr/include/usb.hIf you see /usr/include/usb.h and libusb-0.1.so.4.4.0 or higher, or libusb-0.1.4.4.0 or higher, you don't need to install or upgrade libusb. Otherwise, download libusb at the website mentioned above, and install it using the instructions that come with it. Here is how I did it.
tar zxf libusb-0.1.10a.tar.gz
./configure --prefix=/usr
make
make install
Check where the file "hiddev.h" was installed. For example, in /usr/include/linux/hiddev.h.
tar zxf nut-2.0.3.tar.gz
cd nut-2.0.3
All following commands in these instructions are assumed to be issued from inside the "nut-2.0.3" directory.
./configure --with-user=ups --with-group=ups --with-drivers=usbhid-ups --prefix=/usr
make
Note: the "--prefix=/usr" options causes all files to be installed in /usr, rather than /usr/local (the default). I prefer this because sometimes /usr/local is not mounted when the system's shutdown script runs, and you definitely need to be able to access your UPS while the computer shuts down.
Also note: if you happen to re-run "./configure" with different options, then you must also run "make clean" before you run "make" again.
Trouble shooting: if you get an error message saying "usb.h: No such file or directory", then you did not install libusb correctly. Go back to step 1. above.
useradd -r ups
/usr/etc/ups.conf:
----------------------------------------------------------------------
[apc]
        driver = usbhid-ups
        port = auto
        desc = "APC Back-UPS ES 650"
----------------------------------------------------------------------
Set up the ownership and permissions of the file you just created:
chown ups:ups /usr/etc/ups.conf
chmod 0600 /usr/etc/ups.conf
mkdir -p /var/state/ups
chmod 0700 /var/state/ups
chown ups:ups /var/state/ups
drivers/usbhid-ups -u root -DD -a apcThis should give you lots of debugging output and should announce that your UPS was found. This is just a test. Don't forget to stop the driver again by pressing CTRL-C.
Note: until you install the hotplug script (see the next step below), the usbhid-ups driver must be run as the root user, which is specified by the "-u root" option.
Trouble shooting note: if the debugging output does not contain any lines starting with "Checking device...", then libusb is not finding your USB devices. On Linux, check the contents of /proc/bus/usb. If this does not exist or is empty, you might have to mount the USB filesystem: try "mount -t usbfs usbfs /proc/bus/usb".
drivers/usbhid-ups -u root -k -a apcThis should shut off your load for a short time. The best way to see this is by plugging a desk lamp (not your computer!) into your UPS. Make sure you plug it into one of the outlets marked "Battery Backup plus Surge Protection", and not just "Surge Protection".
Do the following. Note that the file "scripts/hotplug/libhidups" should have been generated by "./configure" above.
cp scripts/hotplug/libhidups /etc/hotplug/usb/
cp scripts/hotplug/libhid.usermap /etc/hotplug/usb/
chmod 0755 /etc/hotplug/usb/libhidups
chmod 0644 /etc/hotplug/usb/libhid.usermap
Check if the hotplug script is working. You will need to know the answer to this before you continue. Unplug and re-plug the USB cable of your UPS. Do
ls -lR /proc/bus/usb/You should see listings of several directories. You should see at least one file owned by "root ups", for example:
/proc/bus/usb/002:
total 0
-rw-r--r--  1 root root 43 Aug 28 16:33 001
-rw-r--r--  1 root ups  52 Aug 28 16:33 002
The actual file names will most likely be different; it is the ownership that matters. If you see a file owned by "root ups", then skip the next paragraph and continue with the instructions.
If not, then you might have to call "update-usb.usermap" or something similar depending on the operating system you are running (mine does not need this so I have not tested this). Then repeat the above test (including the unplugging and replugging). If you still see no files owned by "root ups", then you may continue with the instructions below, except that you must add the option "-u root" to all calls of "upsdrvctl", "upsd", and "usbhid-ups" below. Your driver and daemon will have to run as the "root" user rather than the "ups" user.
drivers/usbhid-ups -DD -a apc
drivers/usbhid-ups -k -a apc
make install
/usr/etc/upsd.conf:
----------------------------------------------------------------------
ACL all 0.0.0.0/0
ACL localhost 127.0.0.1/32

ACCEPT localhost
REJECT all
----------------------------------------------------------------------

/usr/etc/upsd.users:
----------------------------------------------------------------------
[admin]
        password = password1
        allowfrom = localhost
        actions = SET
        instcmds = ALL

[monuser]
        password = password2
        allowfrom = localhost
        upsmon master
----------------------------------------------------------------------

/usr/etc/upsmon.conf:
----------------------------------------------------------------------
MONITOR apc@localhost 1 monuser password2 master
MINSUPPLIES 1
SHUTDOWNCMD "/sbin/shutdown -h +0"
POLLFREQ 5
POLLFREQALERT 5
HOSTSYNC 15
DEADTIME 15
POWERDOWNFLAG /etc/killpower
RBWARNTIME 43200
NOCOMMWARNTIME 300
FINALDELAY 5
----------------------------------------------------------------------
Set up the ownership and permissions of the configuration files:
chown ups:ups /usr/etc/upsd.conf
chown ups:ups /usr/etc/upsd.users
chown ups:ups /usr/etc/upsmon.conf
chmod 0600 /usr/etc/upsd.conf
chmod 0600 /usr/etc/upsd.users
chmod 0600 /usr/etc/upsmon.conf
upsdrvctl start apc
upsd
To test whether this worked, see if you can get a listing of the UPS state variables:
upsc apc@localhostThis should output a list of variables and their values similar to the following:
battery.charge: 100
battery.charge.low: 10
battery.charge.warning: 50
battery.date: not set
battery.mfr.date: 2005/04/02
battery.runtime: 2850
battery.runtime.low: 120
battery.voltage: 13.0
battery.voltage.nominal: 12.0
driver.name: usbhid-ups
driver.parameter.port: auto
driver.version: 2.0.3
driver.version.data: APC HID 0.8
driver.version.internal: 0.28
input.transfer.high: 139
input.transfer.low: 88
input.voltage: 110.0
input.voltage.nominal: 120
ups.beeper.status: disabled
ups.delay.shutdown: -1
ups.firmware: 818.w1.D
ups.firmware.aux: w1
ups.load: 20
ups.mfr: APC
ups.mfr.date: 2005/04/02
ups.model: Back-UPS ES 650
ups.serial: QB0514132764
ups.status: OL
You should also be able to issue some instant commands. For a list of available commands, type
upscmd -l apc@localhost
Instant commands supported on UPS [apc@localhost]:

test.panel.start - Start testing the UPS panel
test.panel.stop - Stop a UPS panel test
load.off - Turn off the load immediately
shutdown.return - Turn off the load and return when power is back
shutdown.stop - Stop a shutdown in progress
beeper.on - Enable the UPS beeper
beeper.off - Disable the UPS beeper
To issue an instant command, type a command like the following:
upscmd -u admin apc@localhost load.offThis should briefly shut off the load. When prompted for a password, type password1 from above.
upsmonThe UPS monitor is a program that is responsible for shutting down your computer if there is a power outage and the battery is low. Simulate a power failure by unplugging the UPS from the wall socket. Within a few seconds, you should receive a message from the daemon on your terminal announcing the fact. Try plugging the UPS back in. You should receive another message.
if [ -f /etc/killpower ] ; then
    # if USB is already disabled, re-enable it.
    if [ ! -f /proc/bus/usb/devices ]; then
        echo "Mounting USB filesystem"
        mount -t usbfs usbfs /proc/bus/usb
    fi

    # hotplugging is probably off, so run driver as -u root
    echo "Killing the power, bye!"
    /usr/bin/upsdrvctl -u root shutdown apc
    sleep 20

    # uh oh... the UPS power-off failed
    # you probably want to reboot here so you don't get stuck!
    # *** see the section on power races in shutdown.txt! ***
    echo "Rebooting."
    reboot
fi
Next, try out your shutdown script. Make sure you read the rest of the instructions for Step 15 before issuing the command below, as that command will shut down your computer.
One way to test your shutdown scripts is to unplug your UPS from the wall and to wait until the battery runs out. This method takes a very long time. A better method is to leave your UPS plugged in, and issue the command below. (I am assuming that "upsmon" is already running, otherwise, repeat Step 13 above).
Note: this command will cause your computer to go through its ordinary shutdown sequence, as if there had been a power failure and low battery condition. At the end of the shutdown sequence, you should see the message "Killing the power, bye!", and the desk lamp (or whatever you have attached to your UPS) should briefly go off. Then after about 20 seconds, your computer will reboot. Note: if it had been your computer, and not the lamp, plugged into the UPS, then your computer would have gone off too.
upsmon -c fsd
upsdrvctl start apc
upsd
upsmon
Then repeat Step 15. If you want, unplug the UPS from the wall power before issuing the "upsmon -c fsd" command; the computer should stay off until you plug the power back in.
echo "Starting UPS driver, daemon, and monitor."
/usr/bin/upsdrvctl start
/usr/sbin/upsd
/usr/sbin/upsmon
You must check if this is working. To do so, reboot your computer, then do
/bin/ps -ef | grep upsYou should see, among other things, four lines resembling the following:
ups       7491     1  0 13:32 ?        00:00:00 /usr/bin/usbhid-ups -a apc
ups       7493     1  0 13:32 ?        00:00:00 /usr/sbin/upsd
root      7495     1  0 13:32 ?        00:00:00 /usr/sbin/upsmon
ups       7496  7495  0 13:32 ?        00:00:00 /usr/sbin/upsmon
Answer: As root, do:
echo server_mode=1 > /proc/pmu/options(Thanks to Erick Calder for this question and answer).